Melon Brawler V2
3Lb Lifter for Full Combat (2024)
For an overview of Melon Brawler as a design, please go here
Overview
While Melon Brawler did win my university's sportsman competition, I wanted to see what else I could do. Sportsman robots like Melon Brawler are designed around not needing to face high-damage weapons such as spinners, and most cannot be entered into a full-combat competition. For this reason, I decided to redesign Melon Brawler to face high-damage opponents.
Similarities with V2
I was extremely happy with how Melon Brawler performed, aside from the random bursts of full acceleration. I still (summer 2024) haven't figured out what caused this, whether it was interference or electrical damage. The motors all performed exactly as I wanted, so I would not be changing from the Just Cuz 22mm gearmotors. The Robotpower Wasp I was using on my lifter was also extremely impressive and would not be changed.
Changes from V2
New Motor Controller
While I could have returned to the Quicrun 1060s I used for my drive system on V2, I was hesitant after the electrical issues. Additionally, they come with a massive weight and size penalty. I decided to go with the Robotpower Scorpion CL controller, which is 17g instead of 80.
New Chassis material
The most important change from V1 was the chassis material. The original version used 3D printed PLA plastic, which was all I could print at the time. After the spectacular disassembly of Blastwave IV's PLA chassis and my acquisition of a Prusa i3, I decided to switch to TPU. This filament is extremely flexible, which is the reason for its incredible durability and the necessity for a direct drive 3D printer. TPU is almost rubbery, and will return to nearly its original shape after being twisted several times. I would also continue with the embedded standoff method used for lid retention in V2.
Size Changes
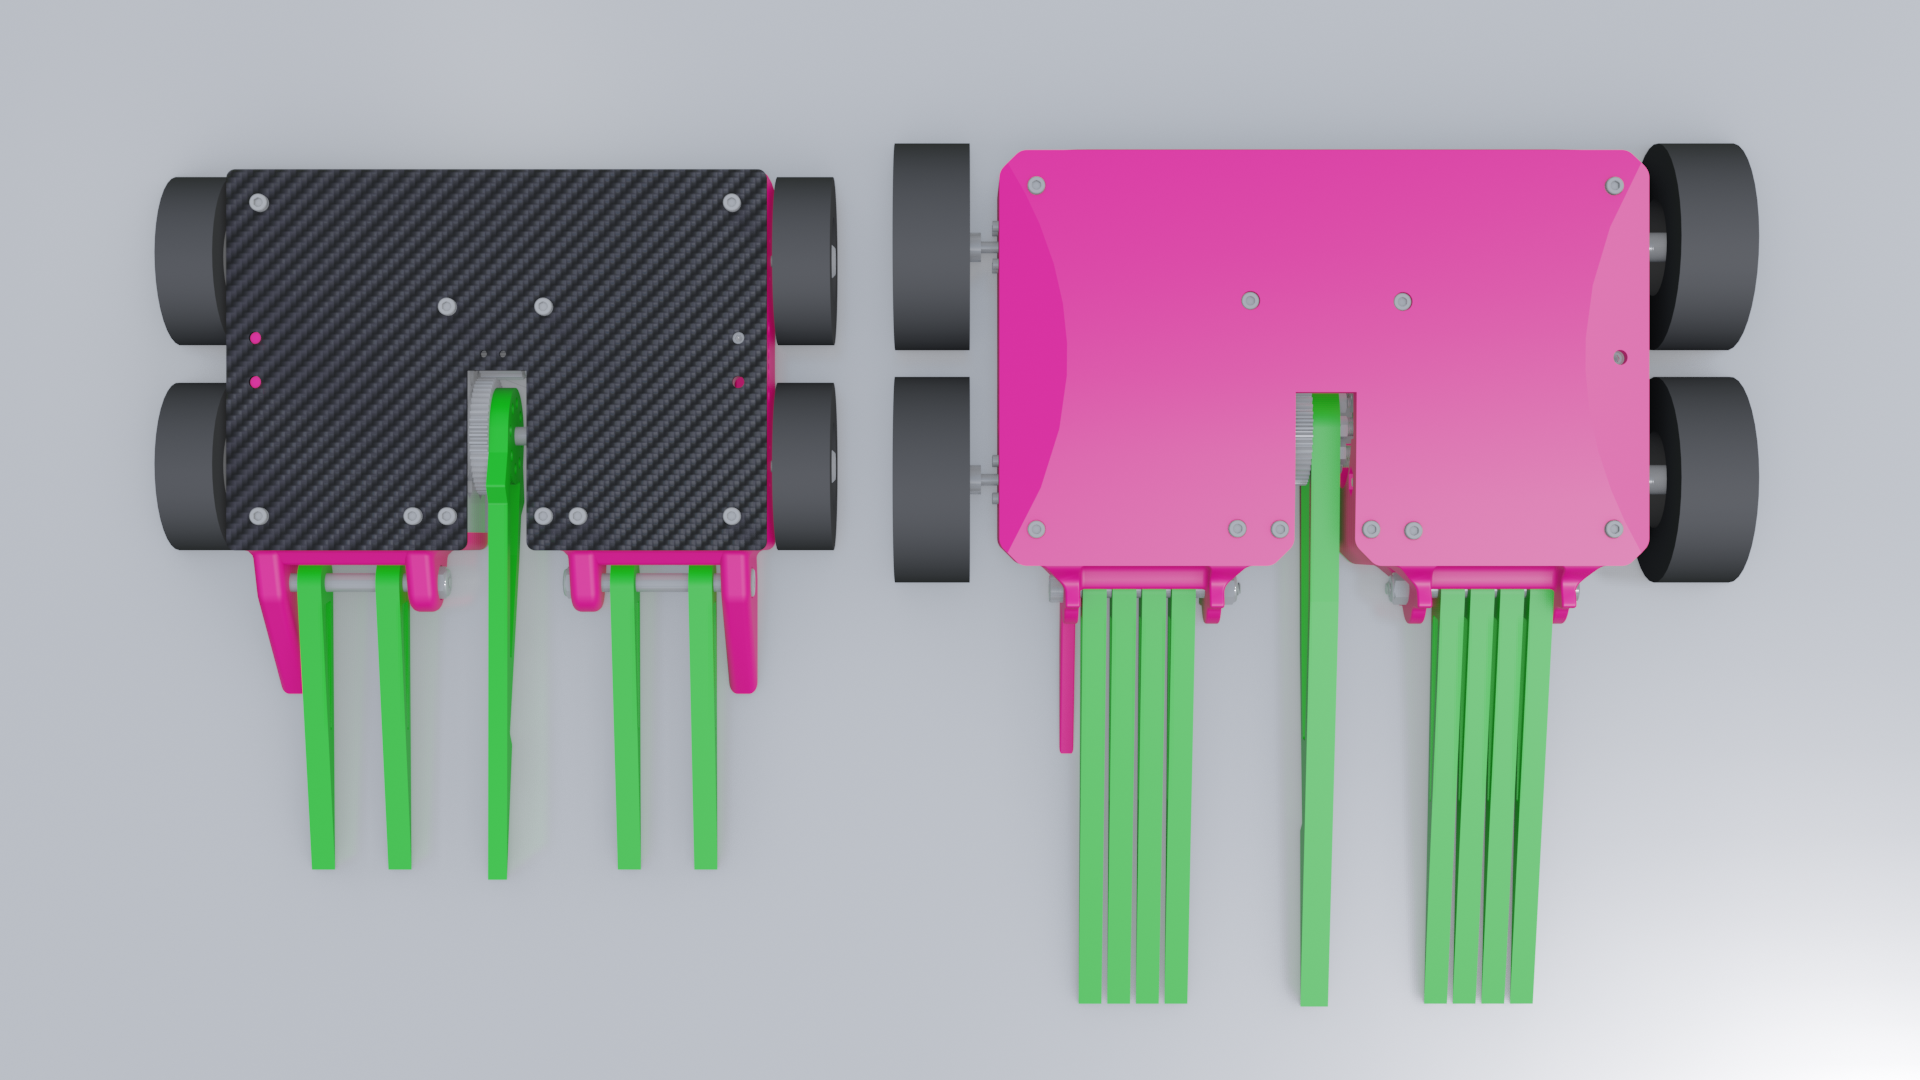
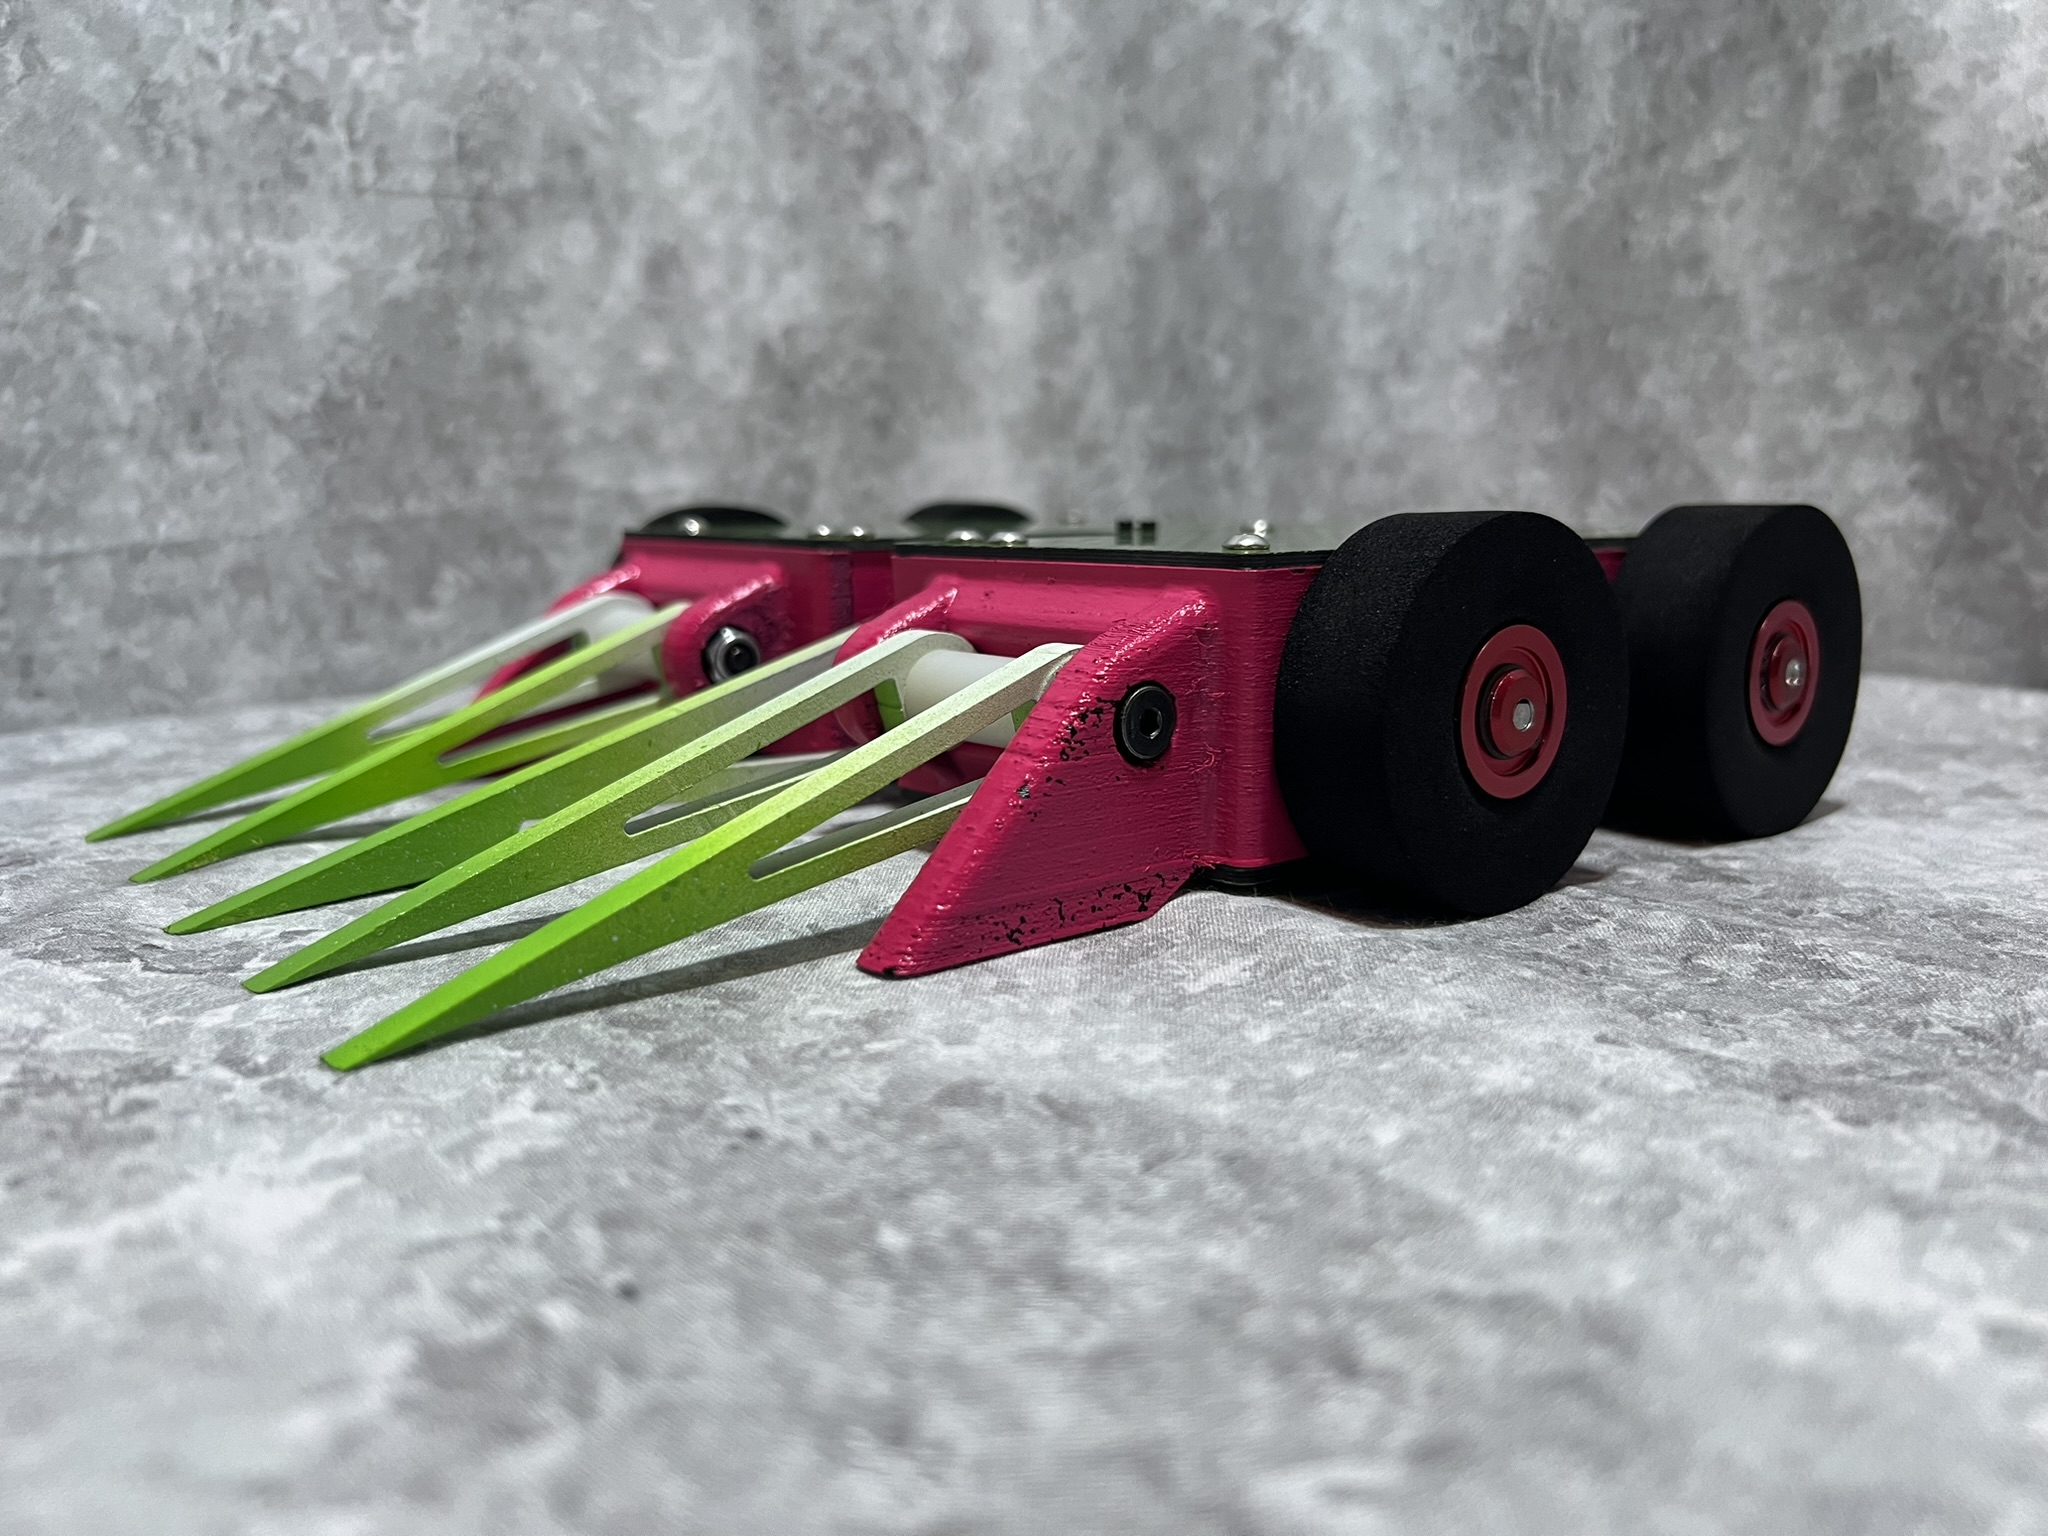
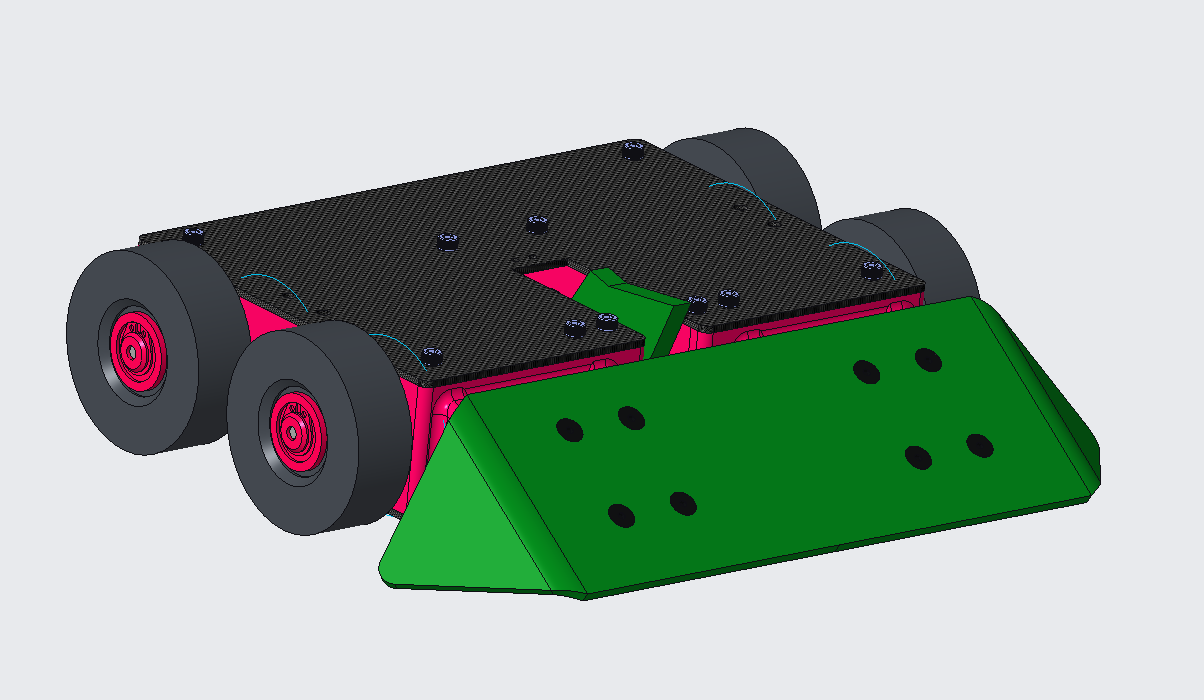
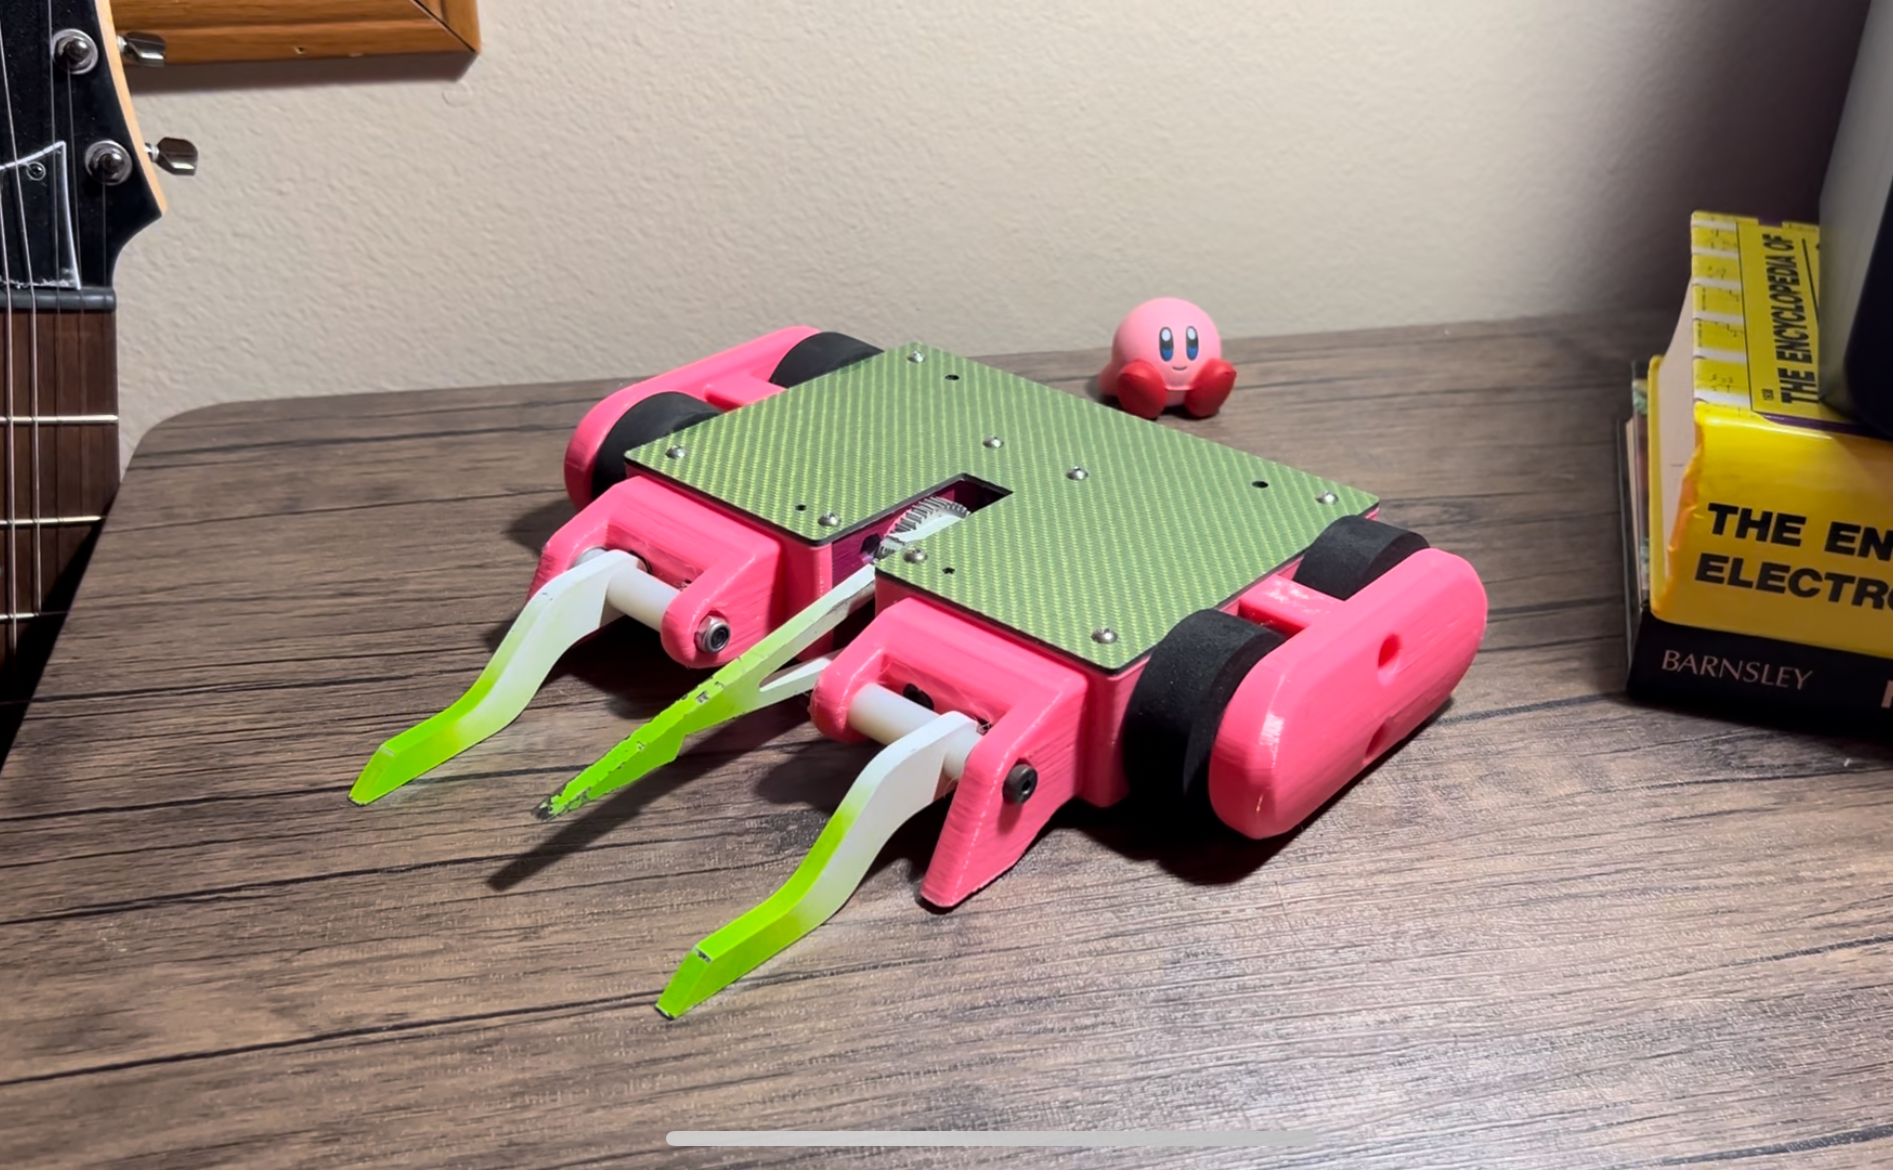
Melon Brawler 2 was redesigned to be significantly slimmer than V2 in all major dimensions to reduce weight to be better spent on armor. The wheels were changed from the 2.75" Botkits wheels I commonly use to 2.25" diameter by 0.75" wide Fingertech wheels. This would let me get slim the chassis down in the vertical axis without increasing my ground clearance.
The side walls were also significantly thickened from the first model, upgrading from 7mm to 12.7mm, with additional walls. This would hopefully provide a bit more of an air gap to protect the internals from hard hits.
Lifter Overhaul
The lifter section was relatively similar to V2, but incorporated a number of minor improvements.
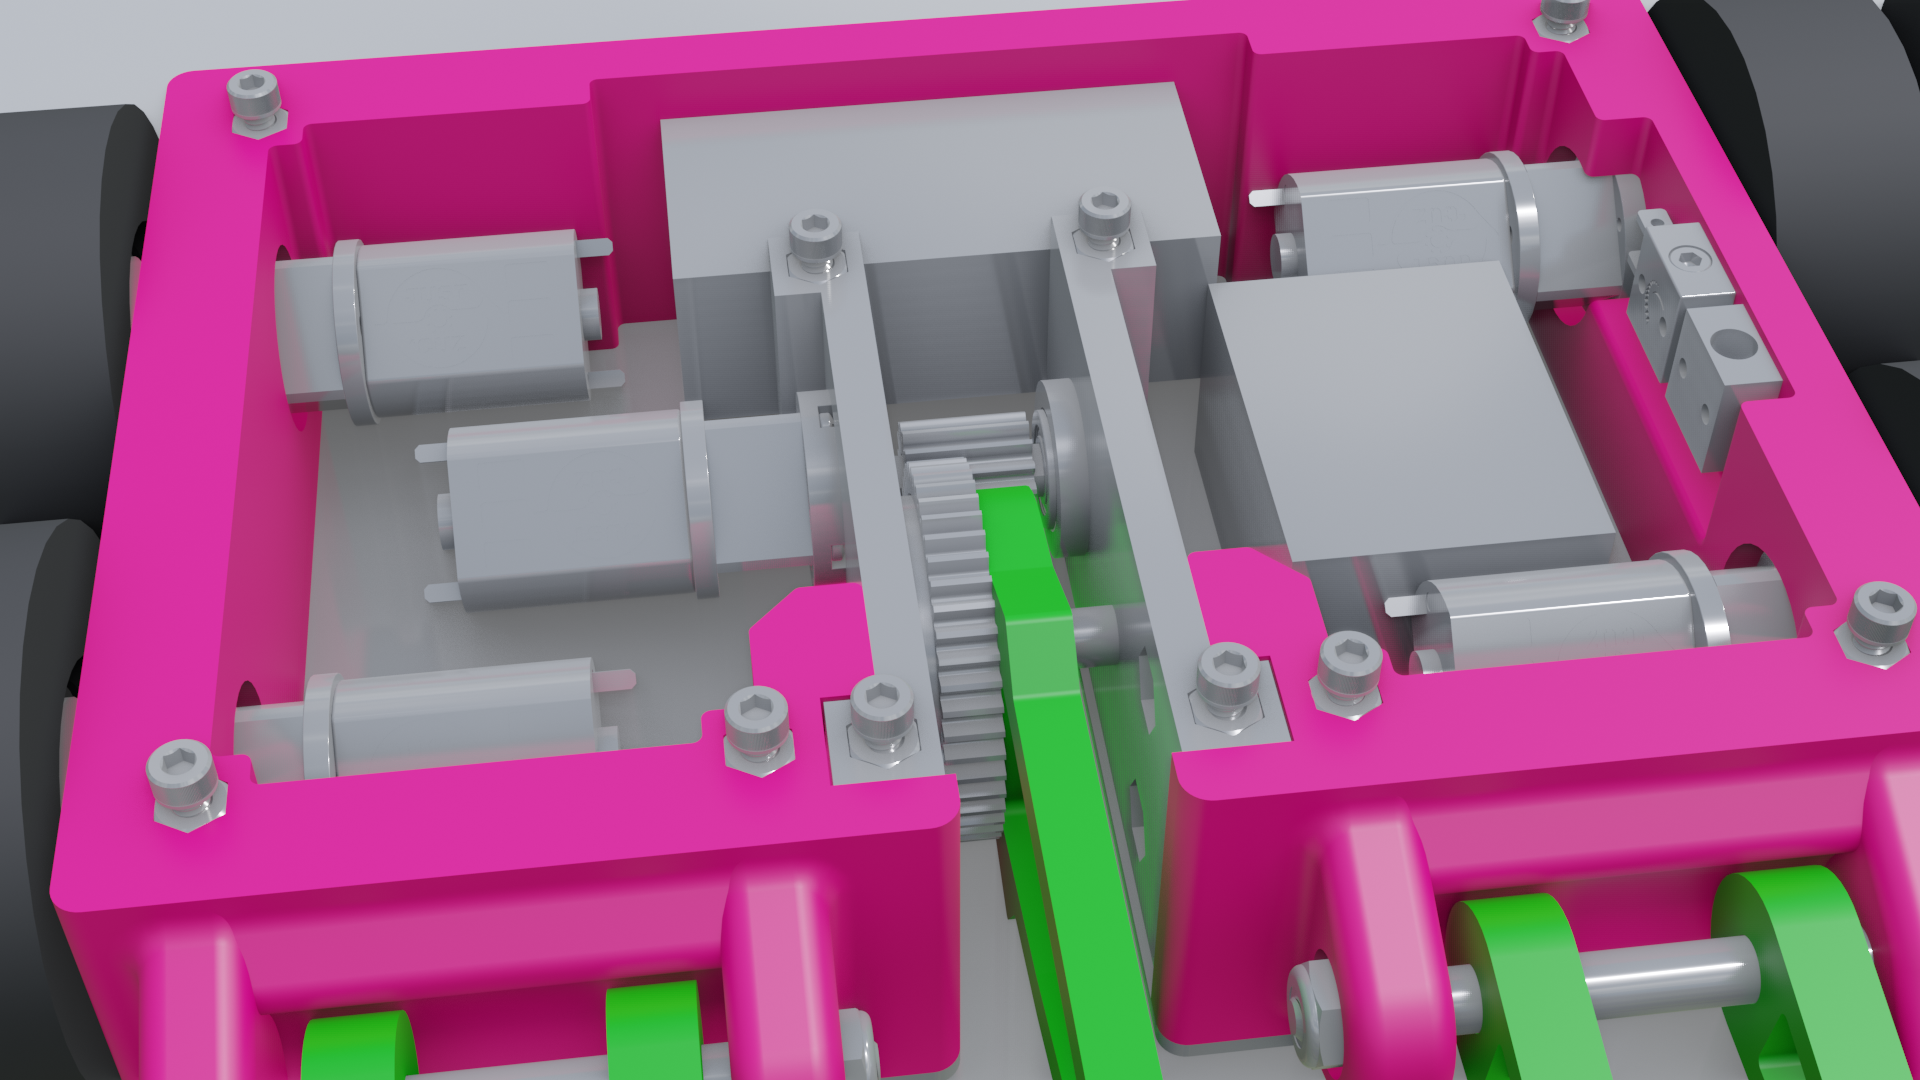
The shaft on the gearbox was upgraded from 4mm thick to 6mm to increase the rigidity of that connection point. The pinion was also upgraded to a wider pinion with a 6mm D-bore from Servocity. It maintained the same tooth count and pitch, so it is functionally identical to the old one, just with a better mesh.
I also finally put a bearing on the opposite side of the gearbox shaft. This prevents the shaft from trying to bend out of the way under heavy load. I had planned to do this on V1, but missed this when ordering and ran out of time. V1 behaved perfectly fine, so it's not completely necessary. This version will be under a lot more stress, so I wanted to dot all my T's.
The one thing I wasn't super jazzed about on V1's lifter was how much wobble there was. I only had one bearing in the lifting fork itself, but the needle roller bearings I'm using aren't super tight, and the fork could wobble 3-5 degrees each way. I decided to solve this problem with a small 3D printed insert that sits within the gear and supports the assembly with a second shaft. From testing, this seems to work extremely well and the whole mechanism feels a lot higher quality.
The support structure for this assembly would be printed out of either PLA+ or PETG, since I didn't want the gears flexing out of the way under load and skipping teeth. This is mildly concerning, but in any case, I hadn't gotten around to testing out nylon on my Prusa yet. Thankfully, PLA+ and PETG are better than standard PLA.
This support structure was supposed to bolt into the main chassis like in V2, but due to the more constricted interior volume, these were impossible to install. I did try just slotting the mechanism in without these, and the lids supported everything extremely well, so I decided to just ignore them. It will make any lifter mechanism fixes much easier, and since there are so many standoffs attaching the lids, the whole thing should be basically as rigid as before.
New Lids
To balance the flexibility of the TPU, I decided to switch the lids from 3D printed PLA to CNC machined Carbon Fiber. The goal of this was for the standoffs and lids to create an extremely rigid structure that would sandwich the TPU frame. This is pretty similar to a number of extremely successful Beetleweights (including Specture, the robot I was the most concerned about fighting...).
The limit switches used to protect the robot from accidentally overextending the lifter were moved to the lids to save space. The lifter mechanism was slimmed down from V1, which removed the space I was using to attach the switches. This will make wiring and reassembly more difficult, but was realistically the only option at this point.
Fork Geometry Updates
Another major change seen between versions was the forks. While the aluminum forks performed extremely well at the university competition, they did not need to contend with other forks or spinning weapons. They also did not hold an edge, and were quickly blunted. To solve this issue and increase my rigidity, I had the forks recut from AR500 steel. These would be significantly heavier than the aluminum ones, but Melon Brawler was also significantly underweight. However, I did shrink the lengths of the forks slightly to ensure that I would fall within the weight limit. --update once I receive them
With the limit switches moving to the lids, I needed to adjust the fork geometry to better hit these switches. The powered forks were updated with small protrusions near the mount.
Wedge
Having seen 3lb combat before, I was most concerned about fighting horizontal spinners. There are a number of terrifying beetleweight horizontals out there, and there seem to be a lot concentrated in the MRCA league region where I compete (Marg, Specture, T3, etc!). For this reason, I needed to build a wedge.
The idea was relatively simple: replace the passive forks with a wedge, and shrink the active fork so it would hide behind the wedge. I could then try and ram it up into the bottom of the spinner and use it more as a control implement.
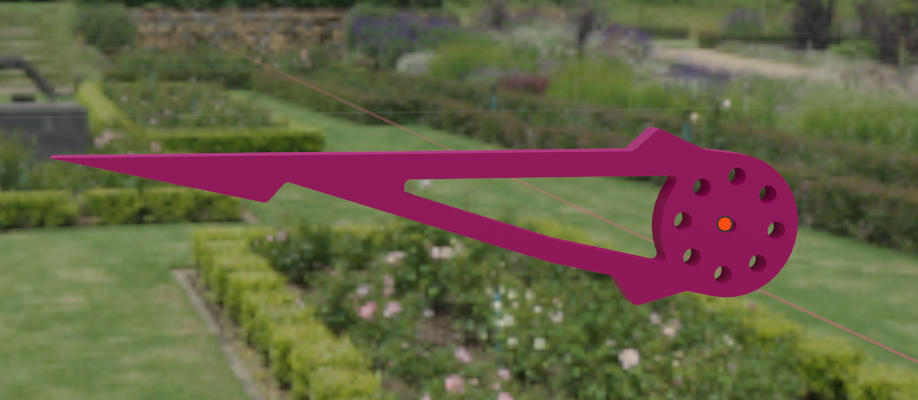
My first attempt at designing a wedge was basically a scaled up version of Stomp Bot 2's wedge. One single piece of metal, bent down on the edges, with countersunk holes to attach it to the mounts. These countersunk holes would allow me to bolt the wedge in place while removing any bite points a horizontal spinner may encounter. The mounts would be printed from TPU, and would have the same needle roller bearings press fit in to allow it to hinge. The mounts and wedge were designed to force the wedge to sit at approximately 36 degrees from the ground, the ideal wedge angle according to Riobotz' Guide.
I investigated materials to manufacture this wedge from, and came to two options: Grade 5 Titanium, and AR500 Steel. From conversations with other builders more experienced in the Beetleweight class, these are the only two recommended options.
AR500 tends to be the cheaper option, but most places don't stock thinner than 3mm, which gets extremely heavy extremely quickly. A 3mm version of this wedge was almost 1lb itself!
The other option is Grade 5 Titanium, which is generally stocked in thinner sheets, but is more expensive. The wedge is massive, and titanium is a pain to bend and countersink, so having the wedge bent and countersunk from a company such as Planeform was way out of my budget for this project (somewhere between $130 and $230 each depending on qty). While I could have bent and countersunk the wedge myself, I don't have the tools necessary, and my shop life is transient and always shifting these days.
I was at a loss for what to do, until I hit a eureka moment. The wedge I was designing and looking at spending a fortune to manufacture was nearly identical to the D2 wedge.
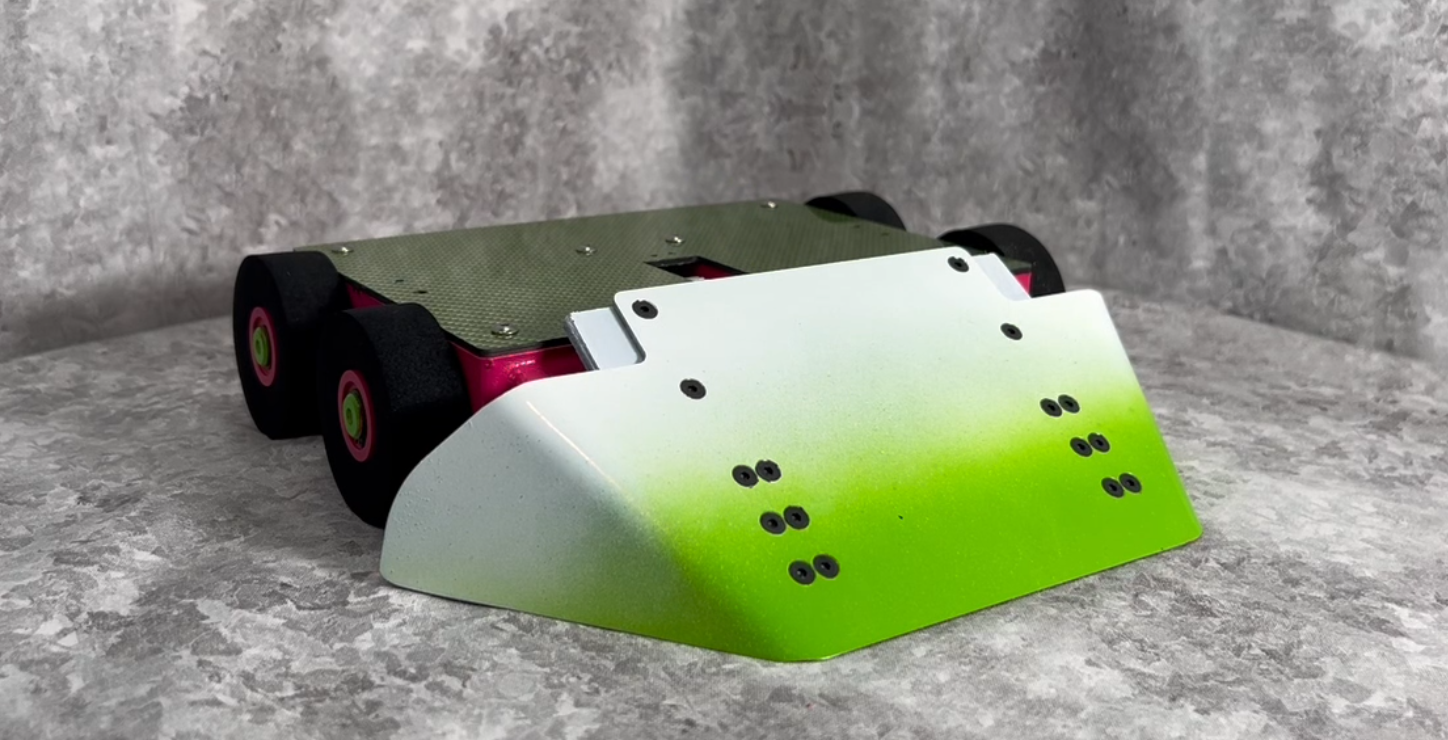
The D2 is a combat robot kit that a lot of people have strong opinions on. It's a kitbot that anyone can buy for $500, throw into an arena, and typically have a pretty good shot of winning. Captain Doom, a modified D2, even competed on Bugglebots and had an extremely good showing.
The wedge costs about $70 pre-sharpened, is made from grade 5 titanium, and has already been bent and countersunk. It's only about 0.5" (12mm) less wide (thinner sounds wrong here) than the old wedge, so it would be a drop-in replacement (ignoring changes to mounting hardware). They don't provide a CAD model of the wedge for whatever reason, so I had to model it from scratch. I think it's pretty close.
The wedge mounts are small TPU prints that house a bearing for the axle and host some nylon lock nuts (nylocks) for mounting. The wedge can pivot slightly, which helps it scrape the ground to better get under other bots.
This page is under construction, here is a bunch of mostly context-less images that kind of show what's been goin on.
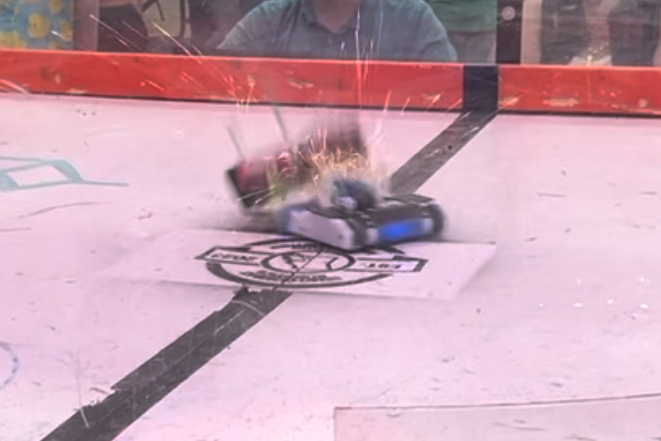
Melon Brawler vs Starting Bonus at SEMO July Jamboree 2024
Melon Brawler 2 post Starting Bonus at SEMO July Jamboree 2024. Lots of wheels missing. This would get fixed for the next major iteration.
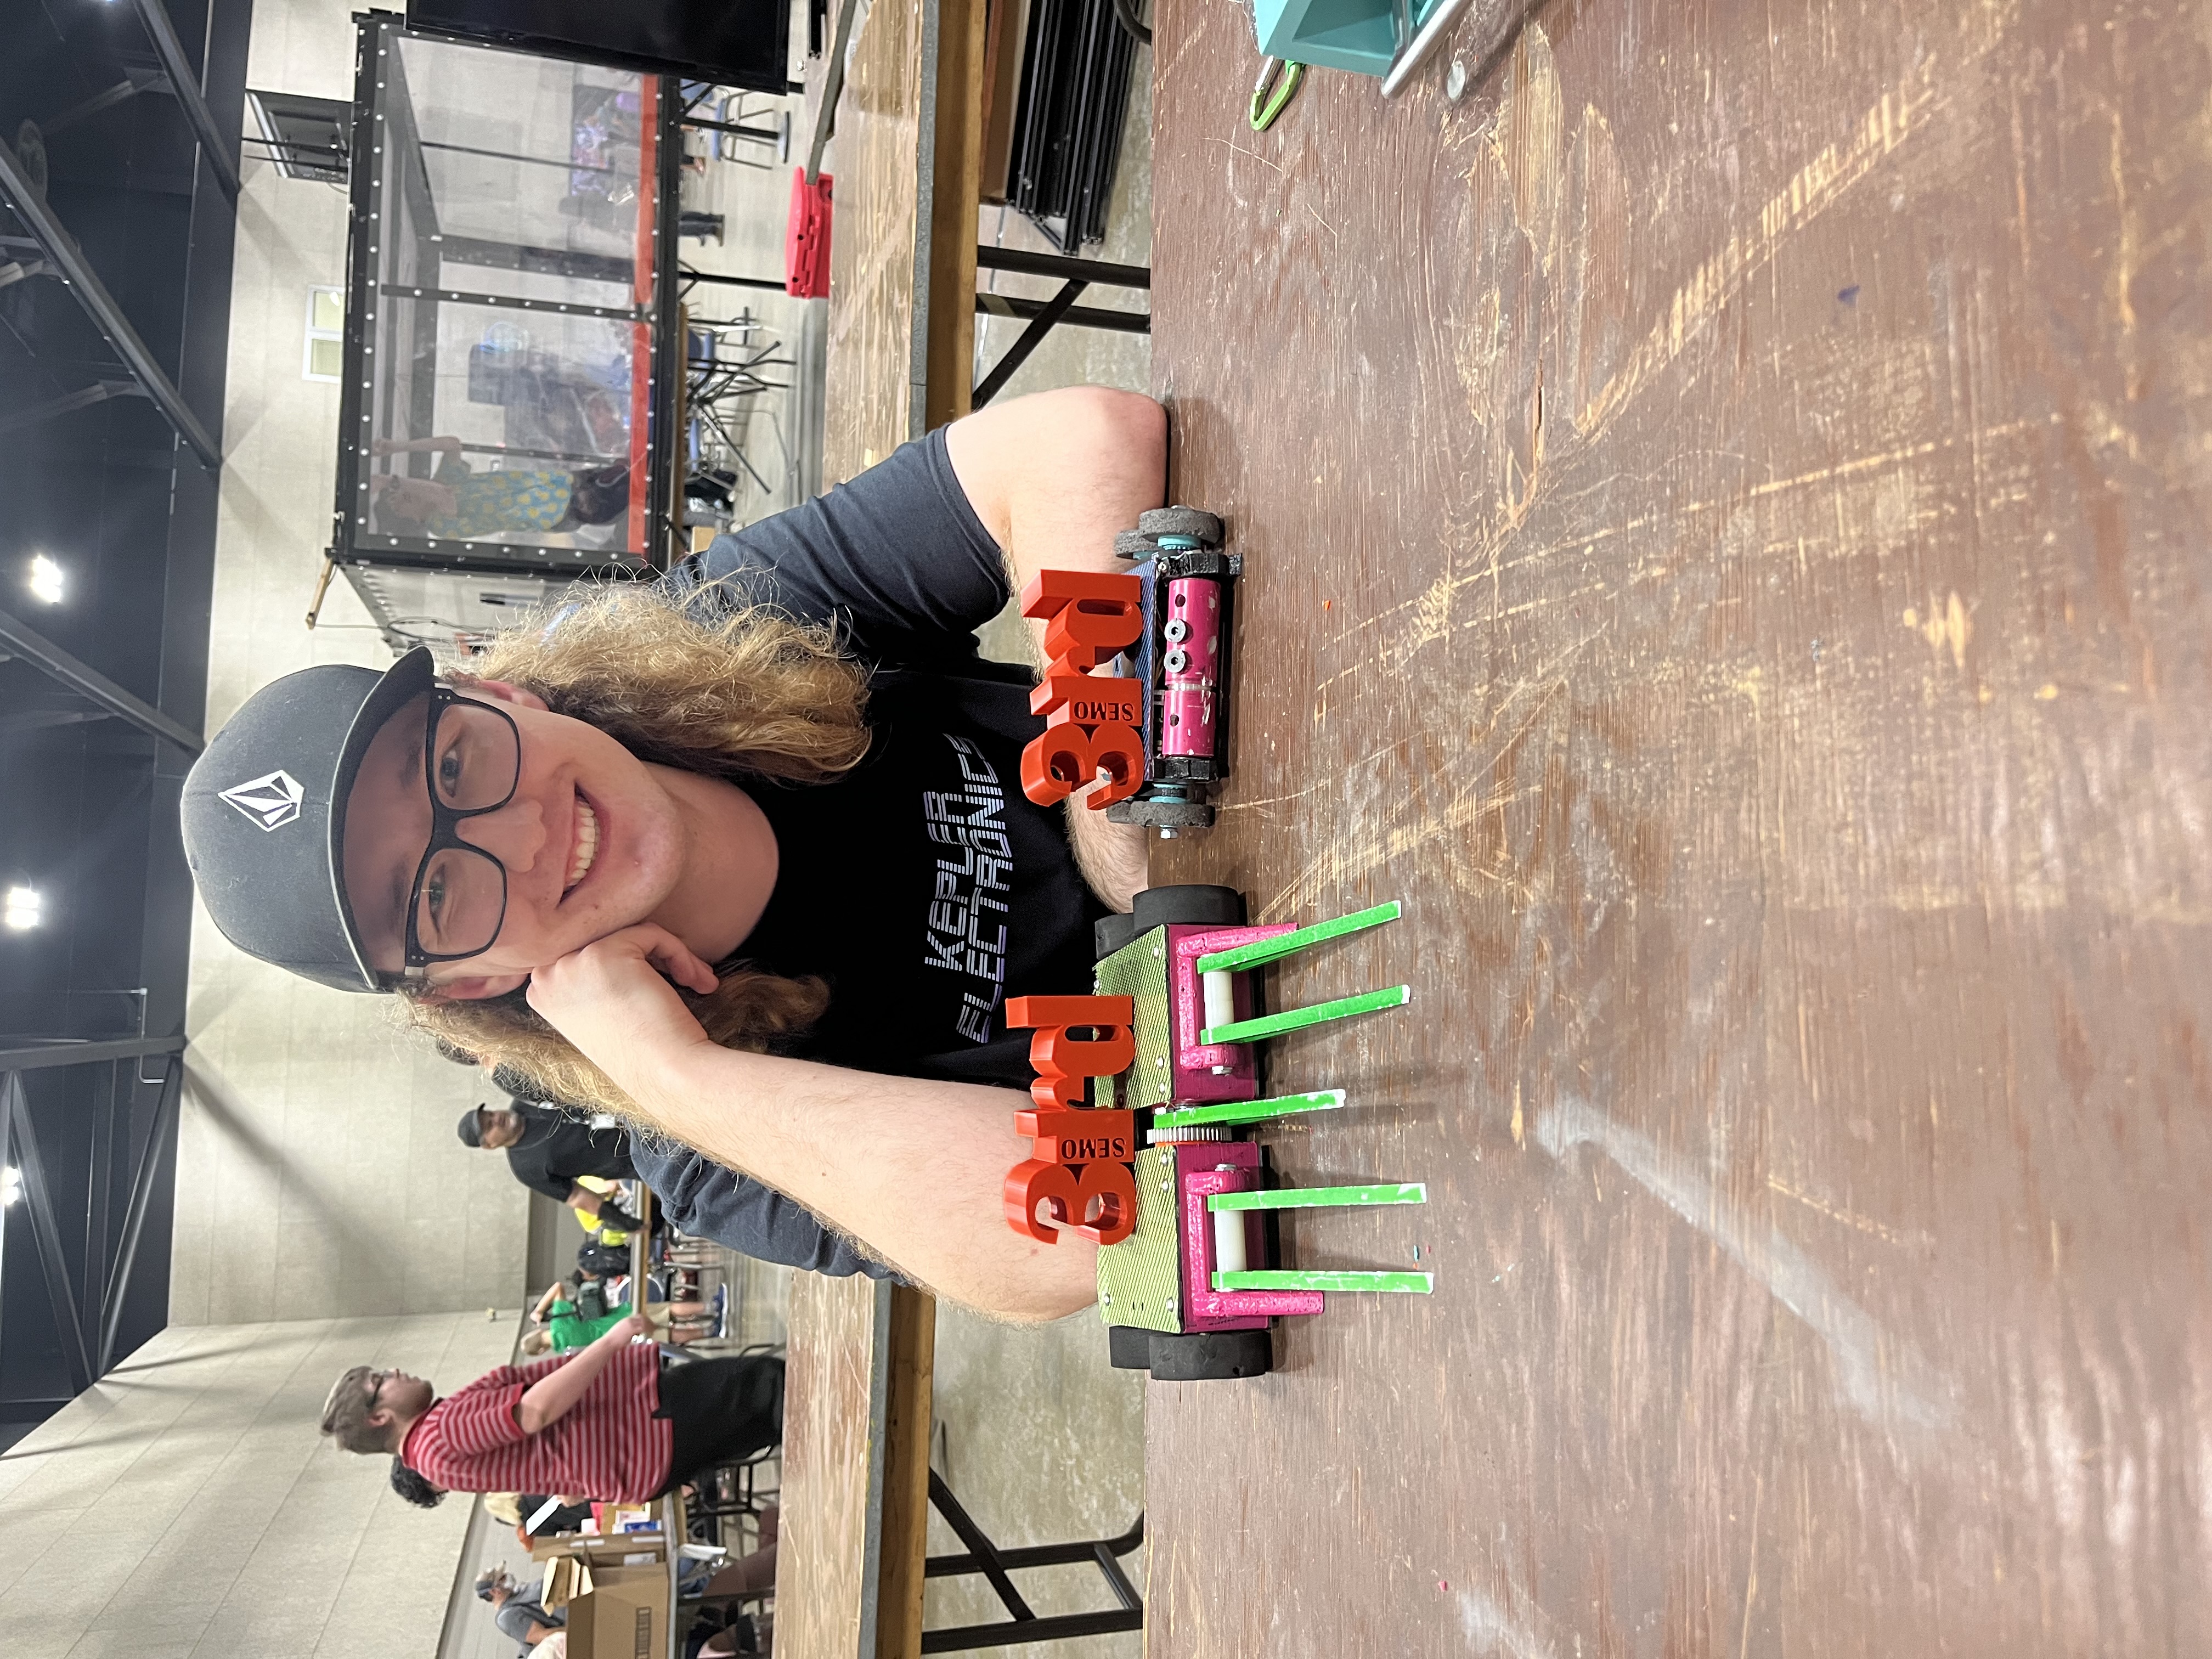
Melon Brawler and Blastwave 5 each got third in their respective weight classes!
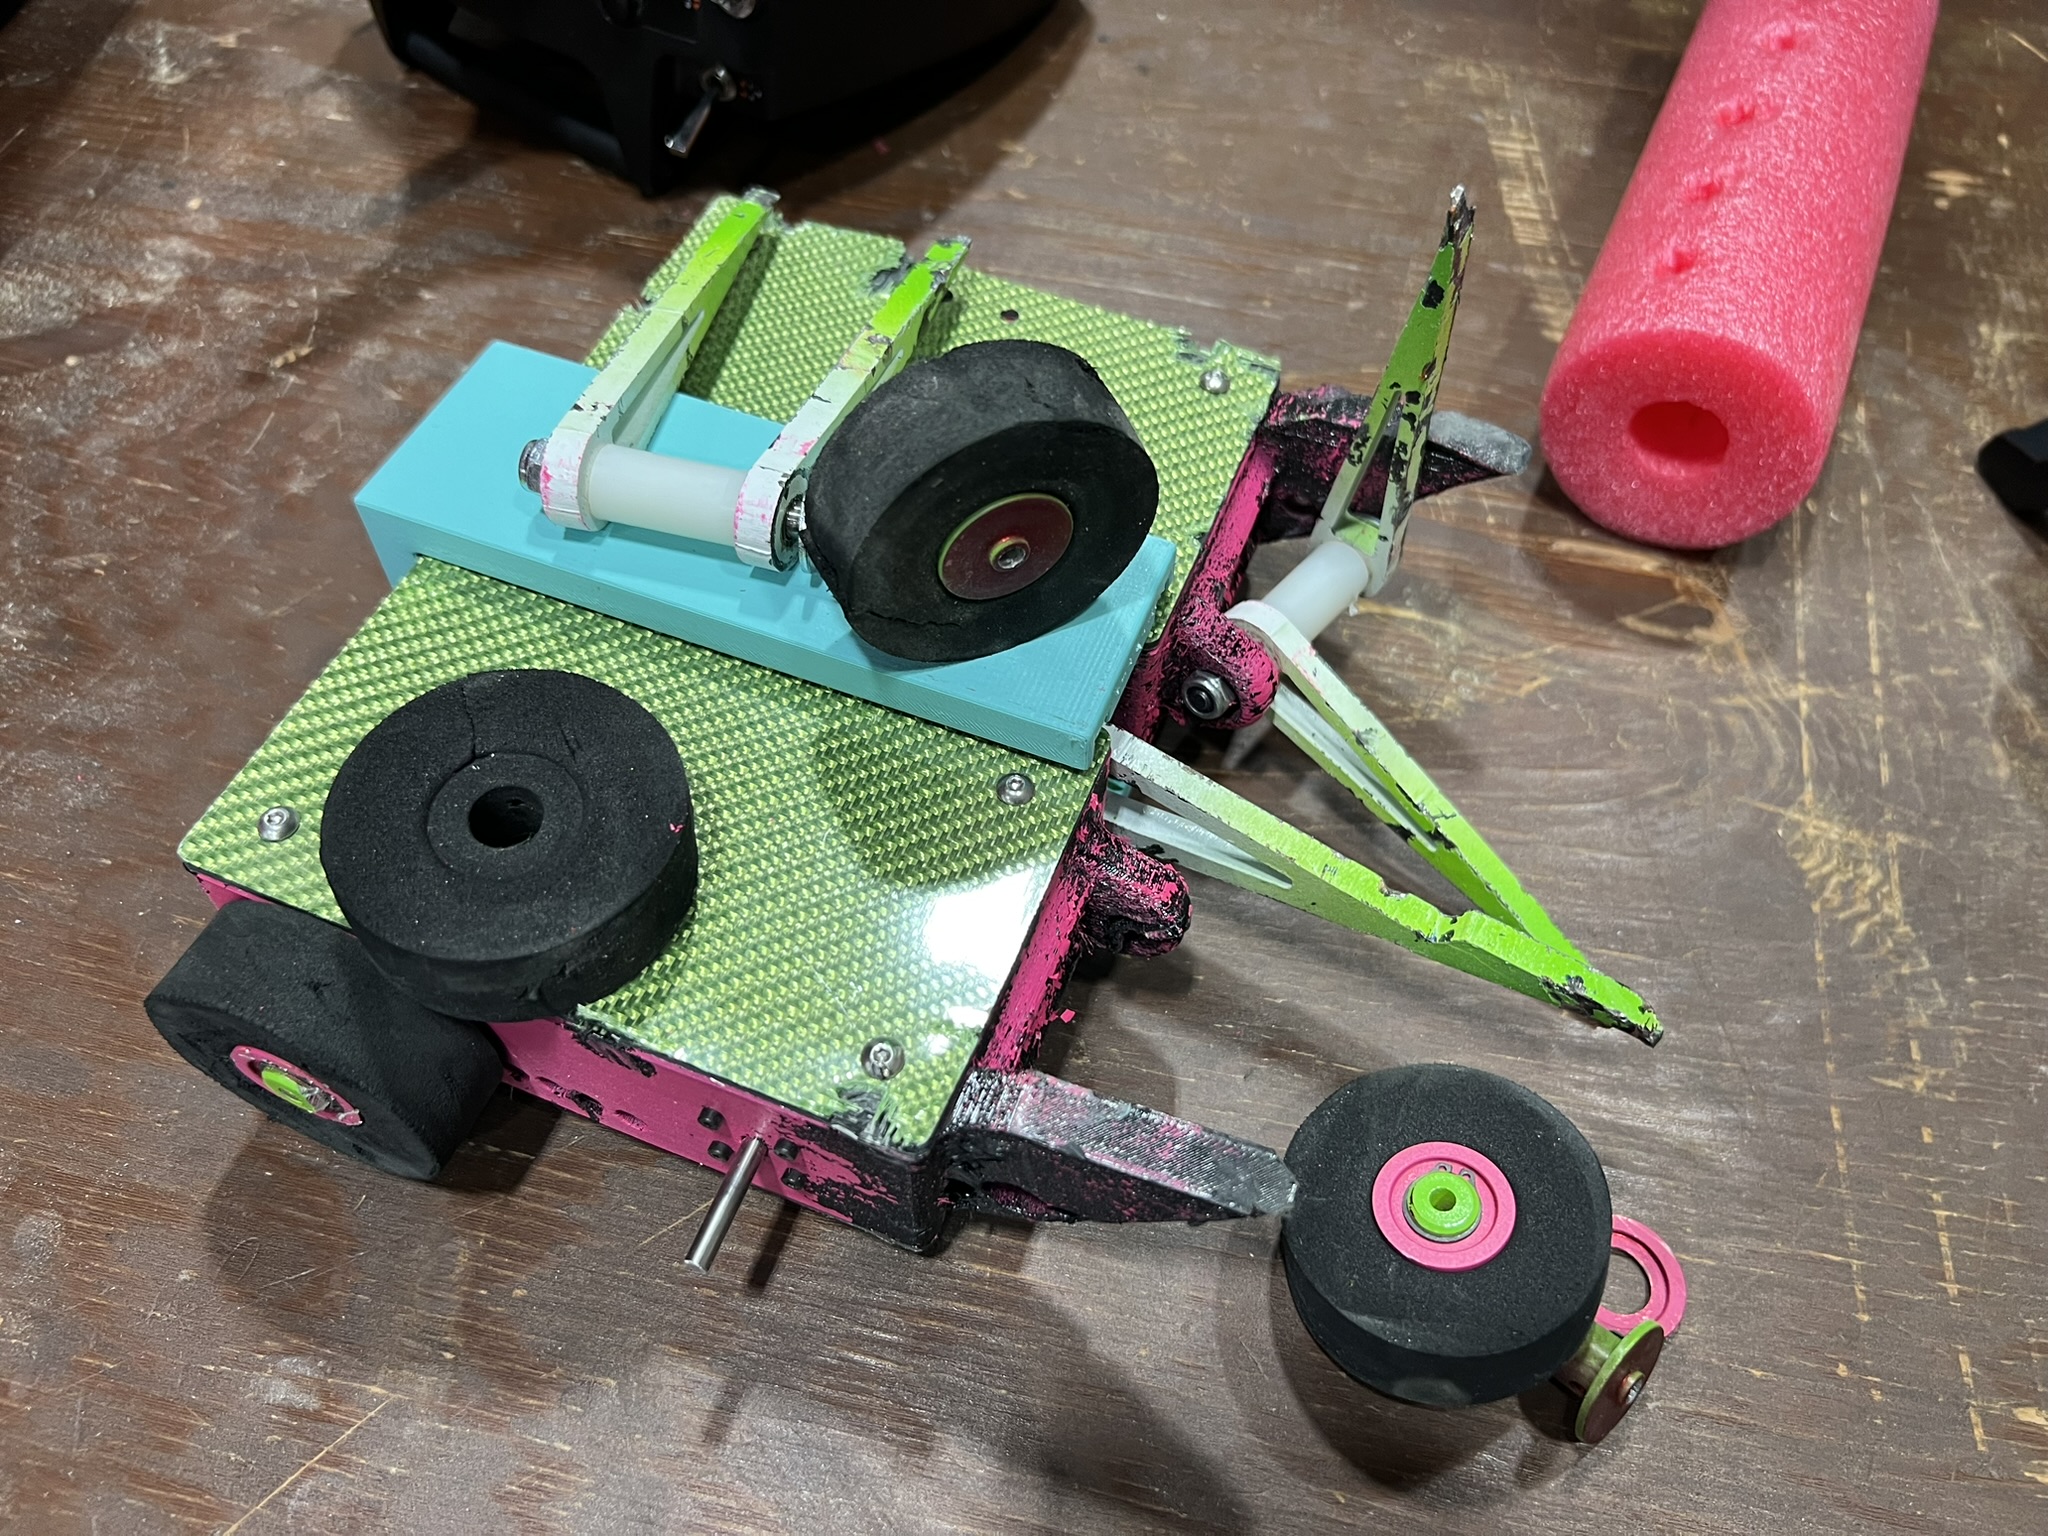
Melon Brawler 2.1 was intended to avoid losing wheels to bots like Starting Bonus, it adds a thick TPU outer wall that spinners will catch before the wheels. This worked wonderfully at the North Dakota Signature, and I didn't lose a single wheel all day (Even to Variant, the #4 ranked bot in MRCA at the time!). The fork mounts are also replaceable, as they kept delaminating on hard hits. This means I won't need to trash a whole chassis if/when it delaminates again.
The current plan is to run this bot until I total the forks or run out of usable lids, then move over to Melon Brawler 3 since that will be designed in a CAD package I have access to.